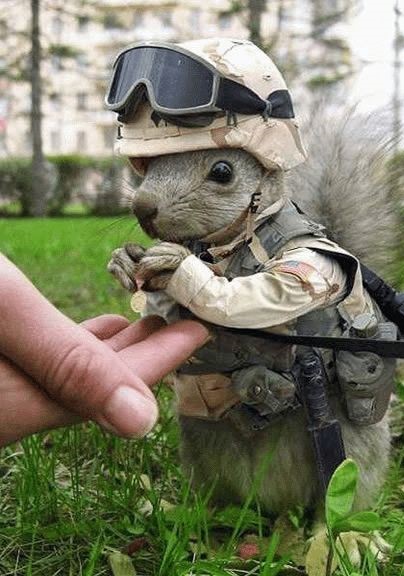
Squirrel chasing robot (object detection)
I wanted to create a robot to chase the squirrels and other animals in my yard away because they are eating the plants:( So the general idea is to have an outdoors wheeled vehicle that is autonomous; it drives around on its own and follows the squirrel by tracking it in the camera.
| Engineer | School | Area of Interest | Grade |
|---|---|---|---|
| Leo L | Monta Vista High School | Computer Engineering | Class of 2023 |
Sixth Milestone
I added a robotic turret for the camera using two servos; it turns to 6 preset locations and calls the nanonets API to do object detection. When a squirrel is detected in a certain orientation, data like “squirrel detected on the left side of the robot and in the air” will be recorded:
Fifth Milestone
After much testing, I found that obstacle avoidance would be smoother with two ultrasonic sensors. With one sensor, there isn’t a way for the robot to know whether to turn left or right. Using two sensors allows for both movements to happen intelligently.
Installation of two ultrasonic sensors:
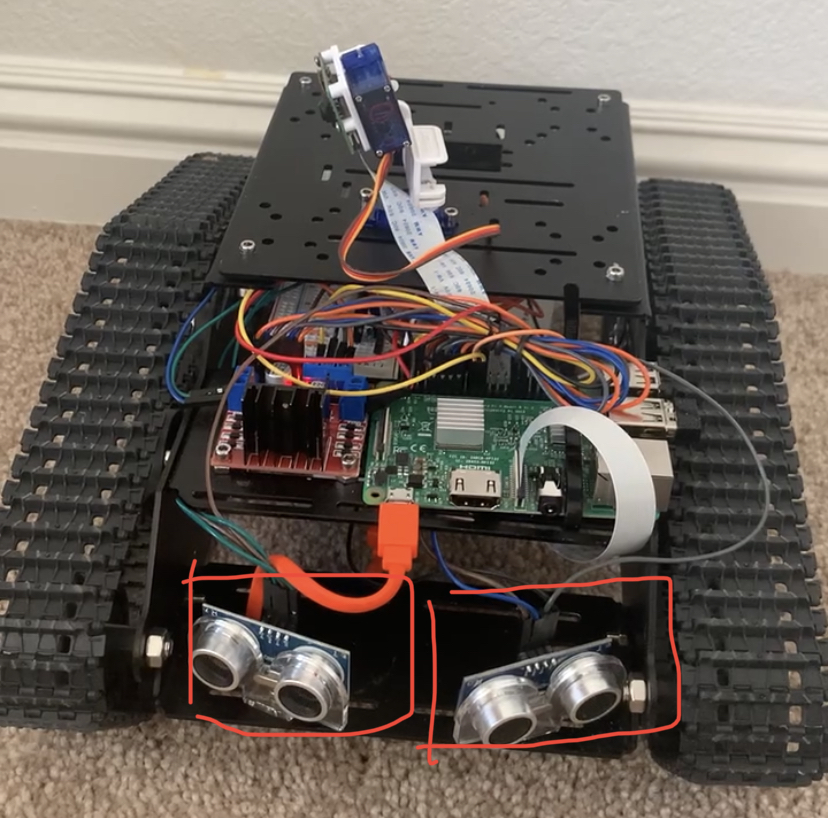
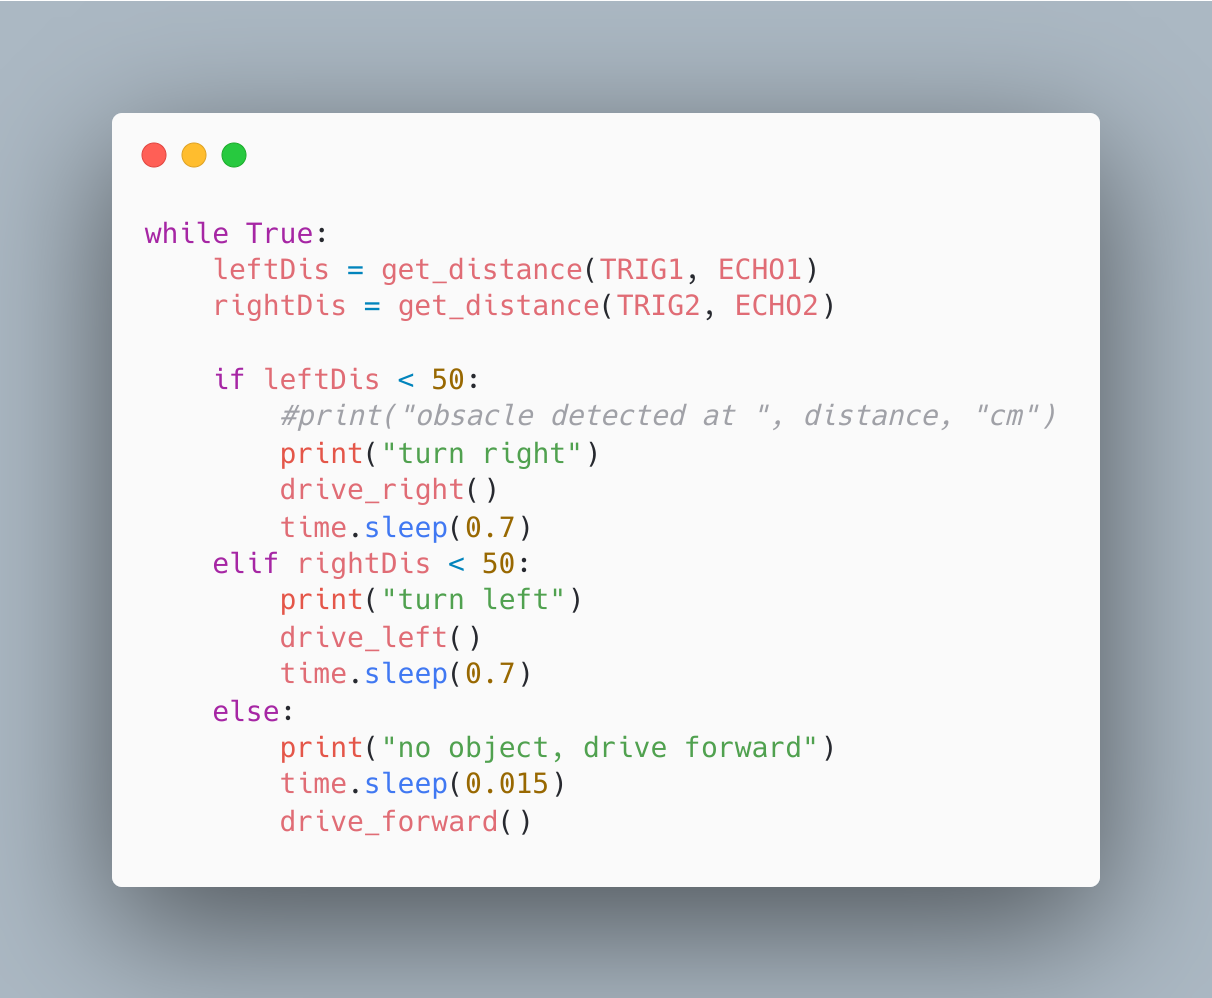
And the general logic is pretty simple. One sensor faces left, and the other faces to the face at 45 degrees. If the sensor on the left side detects an object closer than a set distance, the robot turns to the right. If the right side sensor detects a thing close to it, it turns to the left instead.
The code:
I brought the robot out for the test indoors and outdoors, the improvement yielded some nice results, but better detection under strong lighting needs to be implemented:
Fourth Milestone
I saw places for improvement, especially in autonomous driving. I wanted the robot to be less passive in one single location. Instead, it would be better if the robot could navigate mine or anybody’s yard by itself. I considered line following and mapping, but object avoiding is user-friendly and requires no extra “setups” for anyone using this robot.
I first need to understand how a robot can avoid obstacles. Similar to humans, if we walk too close to a wall, we turn left or right and continue walking. For my robot, it needs a way to detect that distance, requiring the use of an ultrasonic sensor. It’s a cheap little sensor, and the concept behind it is that it will send a sound wave and calculate the time it takes for the wave to return to the sensor. When the sensor gets its data, it must communicate with my raspberry pi: the robot’s brain. I need a circuit diagram this time because there are some complications.
Circuit Diagram:
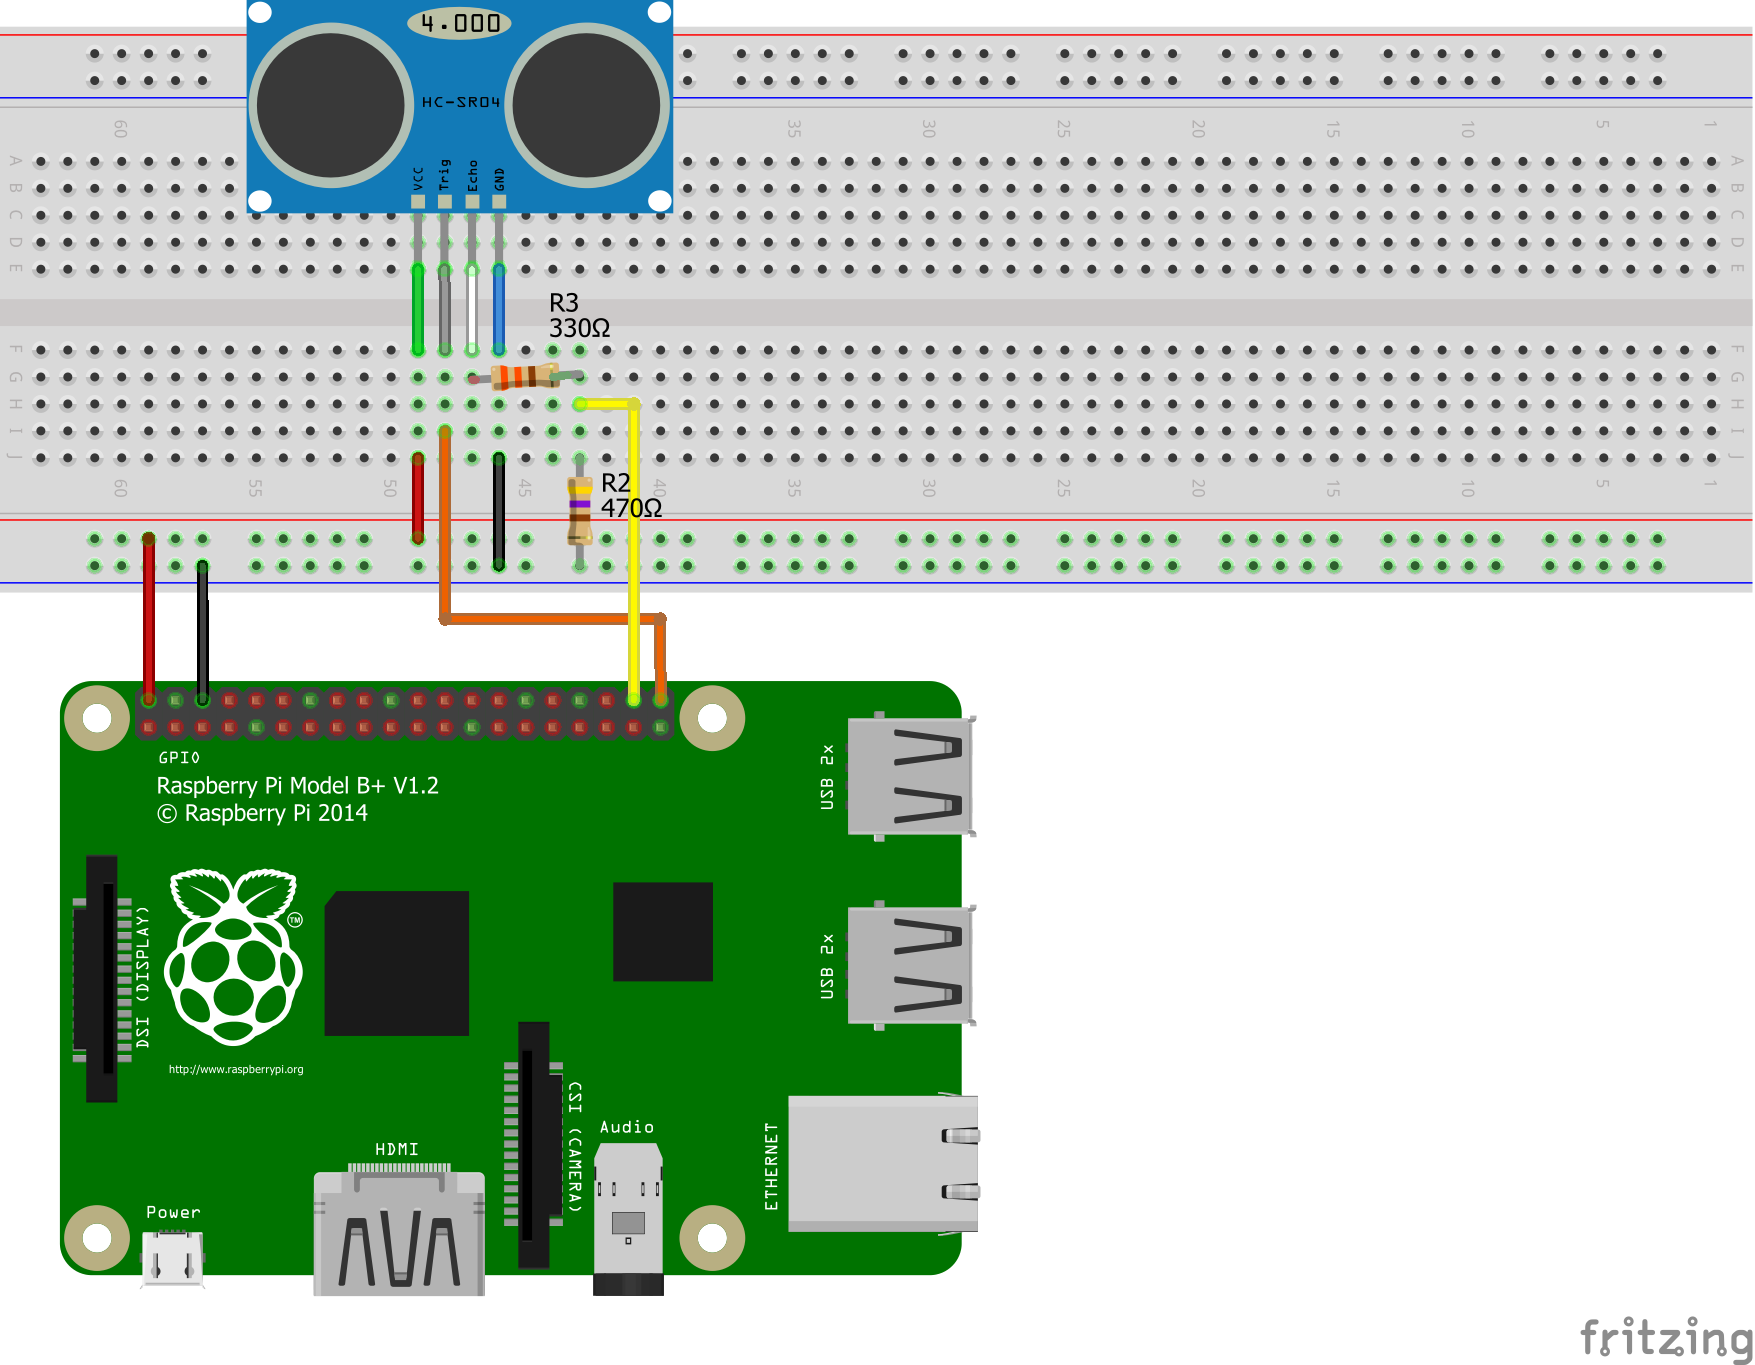
The code for the ultrasonic sensor involved its library in sending pulses and using a timer to record the pulse length. At last, there’s a quick math conversion for the time in microseconds to be translated into centimeters.
Third Milestone
I downloaded OpenCV to take frames from videos in real life and thus detect squirrels in real-time. Using the code I’ve written previously for detection and driving, I combined them into an autonomous driving system. The robot will turn to the right and constantly update its camera to look for squirrels. Once it spots one, it will move forward to scare it away.
Here’s the loop part of the code:
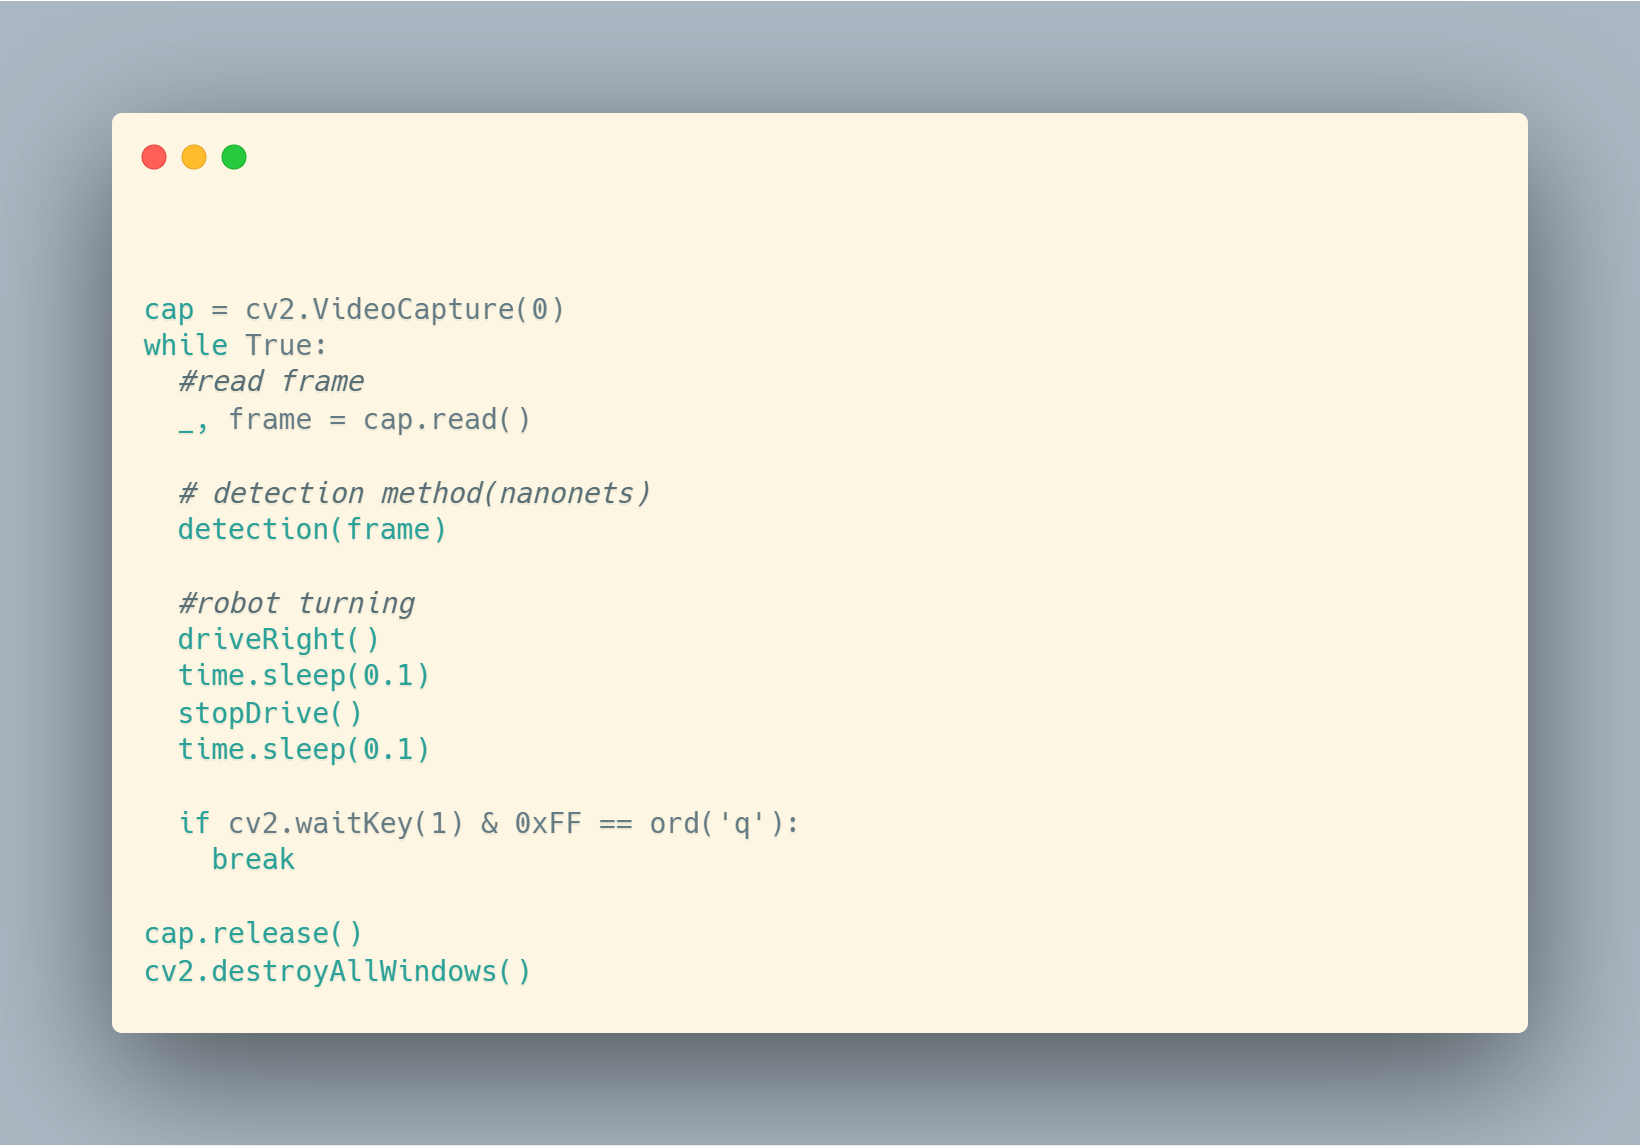
I take in a frame from the OpenCV Livestream and send it to nanonets; if a squirrel is detected, the squirrel drives forward. Else, the robot turns to the right. (Then it loops)
Third milestone video!
Second Milestone
The next step is to make a robot capable of driving around the outside terrain. I chose a tank chassis for my robot to suit that outdoor requirement. This step’s components are wires, breadboard, battery packs, motor driver, and motors. I made a circuit diagram for the first step to plan the electrical components.
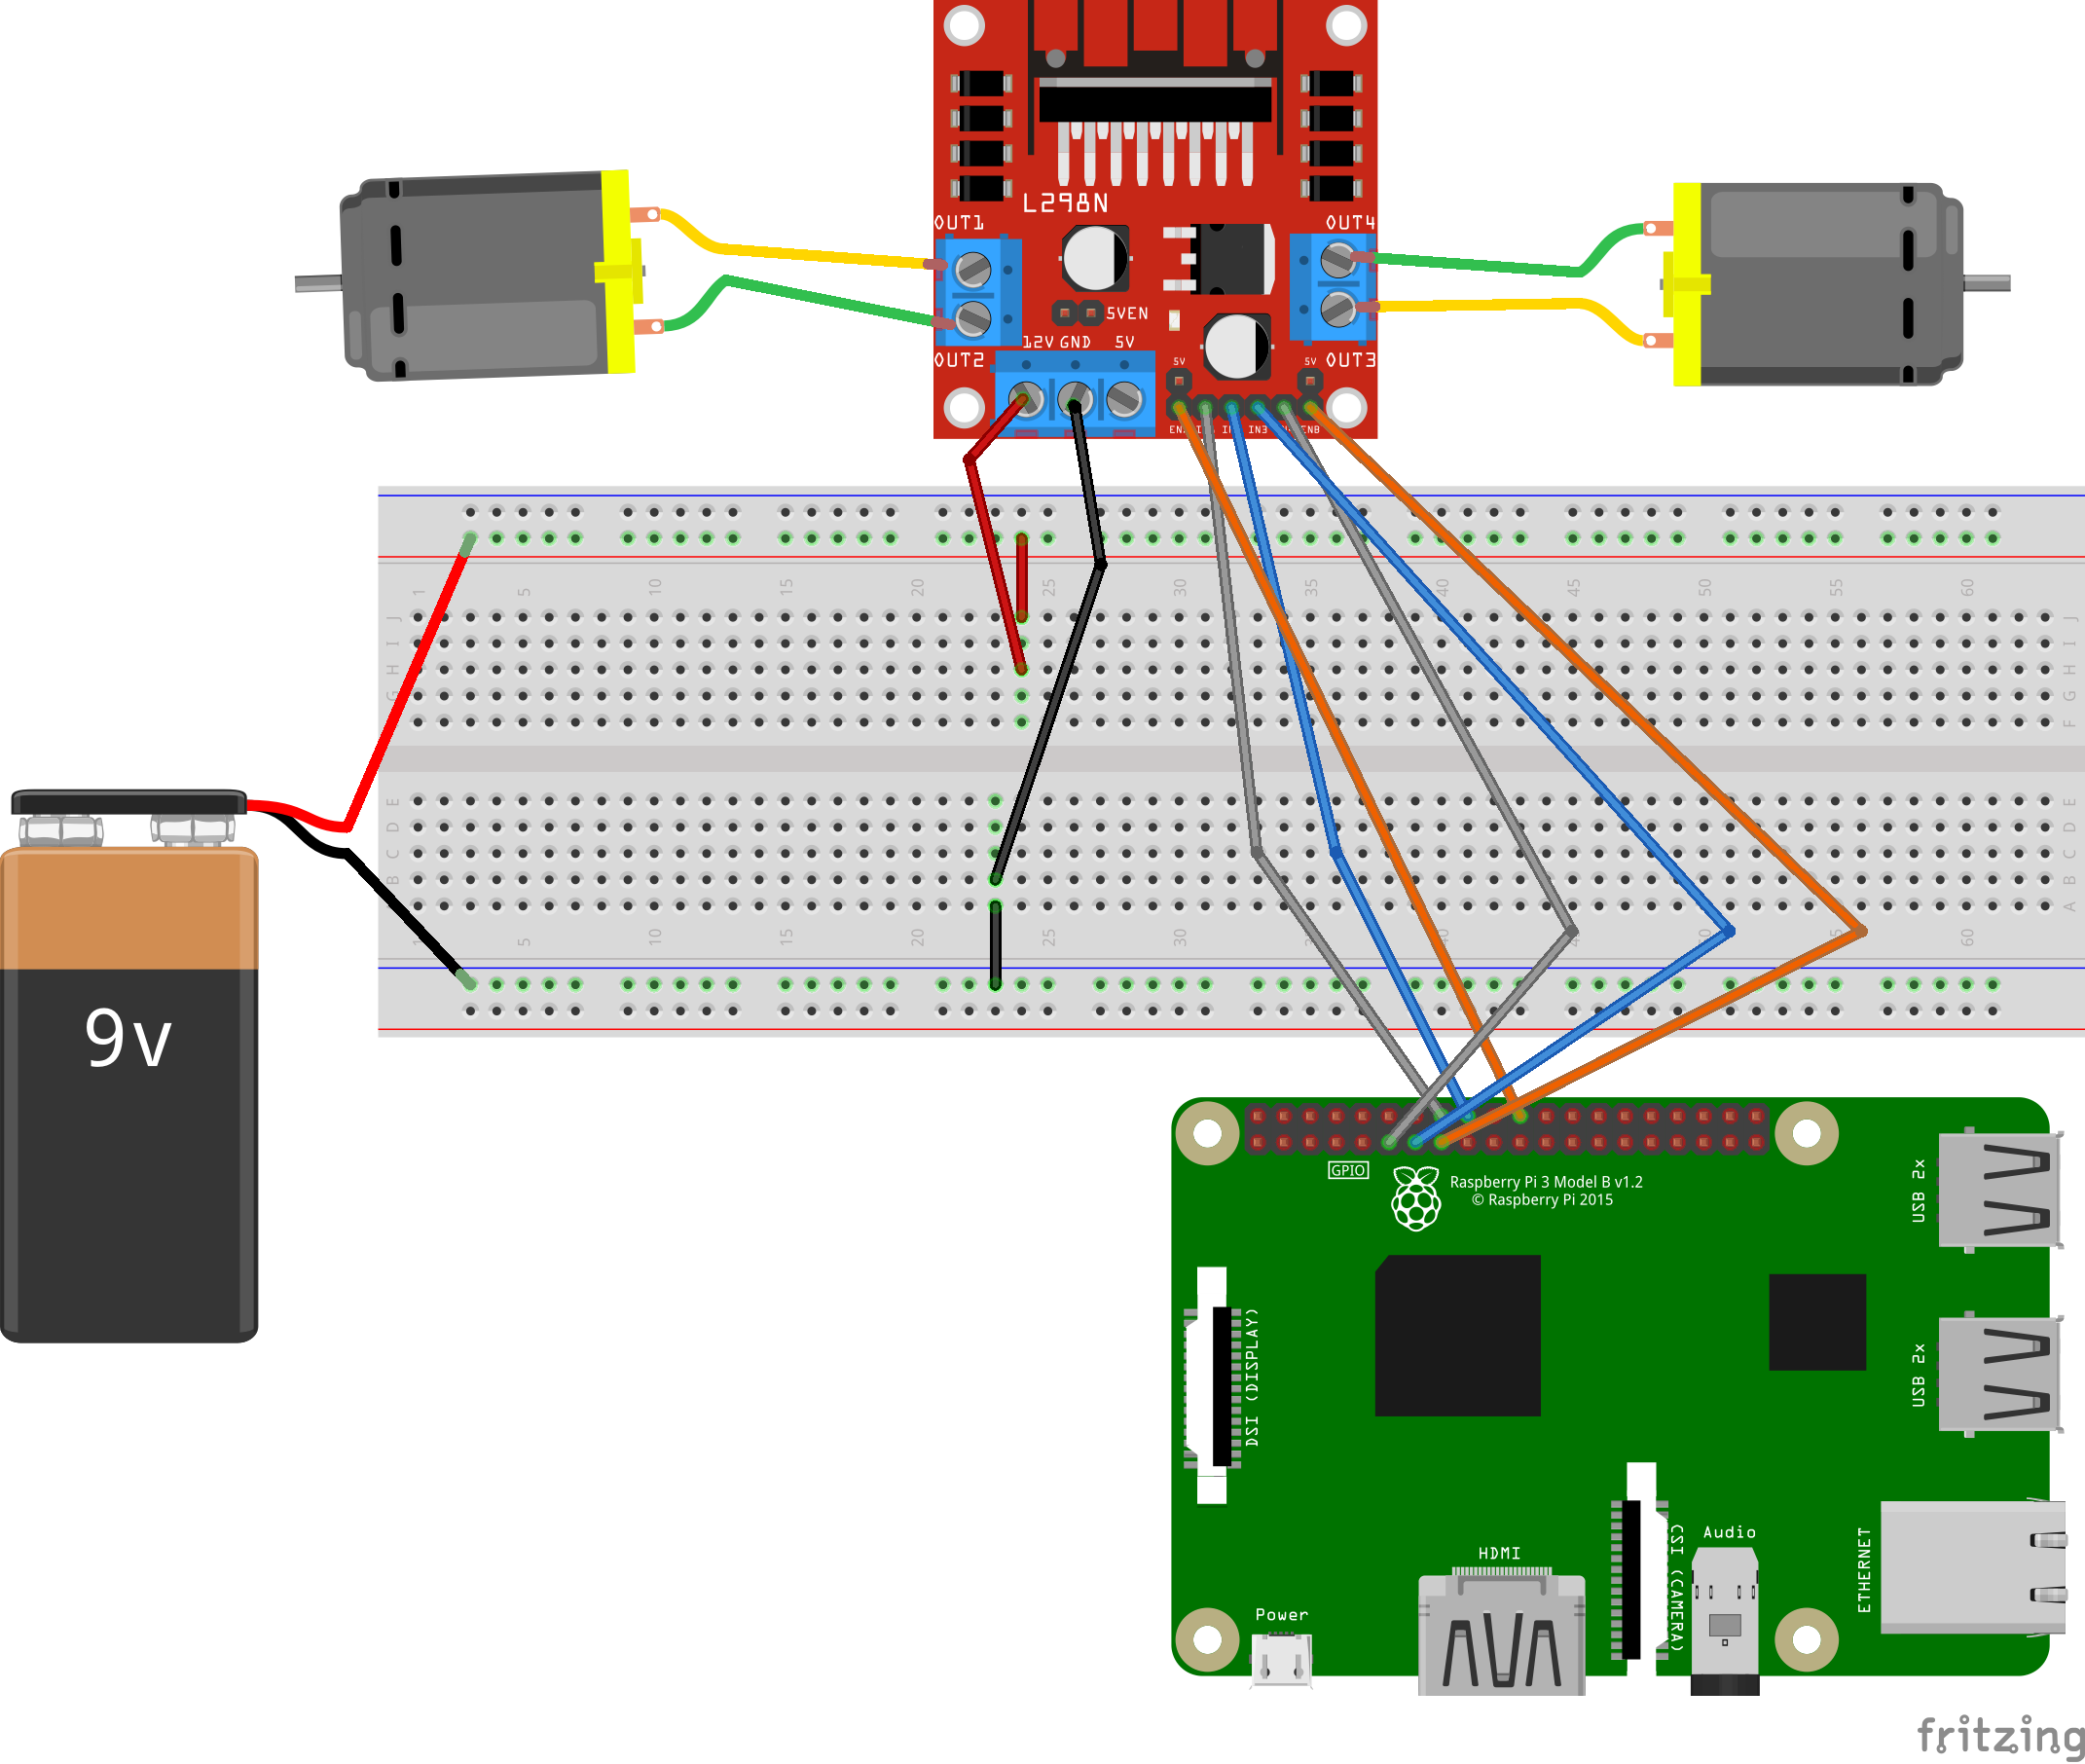
The raspberry pi controls the motor driver, which is then connected to the motors to power them. At last, I looked into the documentation for raspberry pi to send signals using its ports and wrote the code for the robot to run on the keyboard.
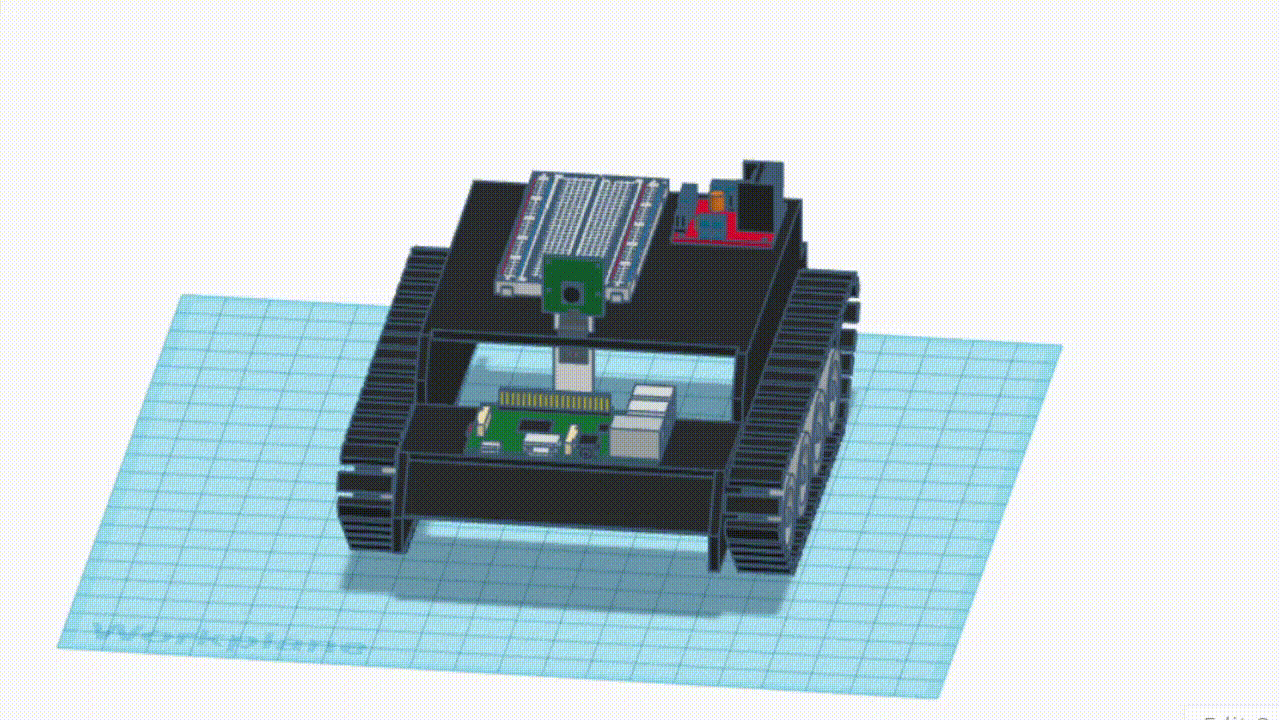
Here’s a 3d CAD I made in tinkercad to help me understand the build:
First Milestone
My first milestone was setting up my raspberry pi and connecting the necessary camera component. I had to install the Raspberry pi imager on the SD card and plug it into the raspberry board; then it powered up. Next, I had to set up VNC to remotely view and control my raspberry because I didn’t have a spare monitor. Now I can control the raspberry pi from a window on my personal computer.
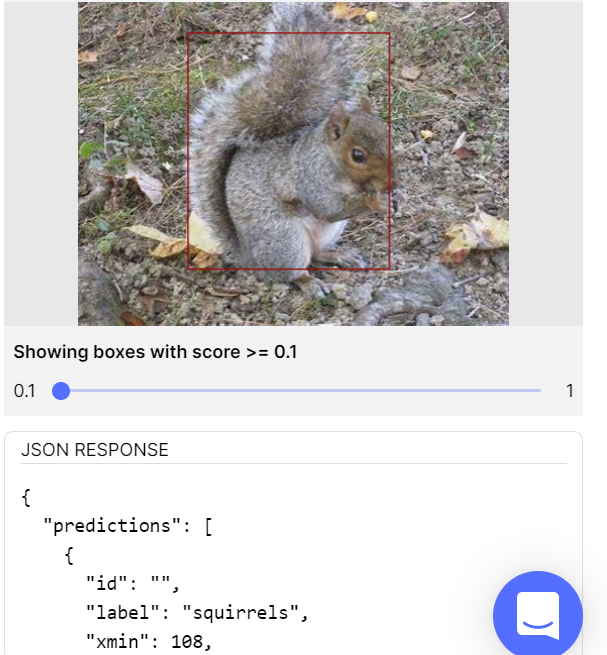
Next, I want to test out object detection. So I went on nanonets, which is an AI training API website. They asked for 50 pictures of squirrels, and I learned that boxing(annotating) the squirrels in the pictures manually helps the model to be trained to identify squirrels. After the training is complete and tested for accuracy, I get a piece of python code that calls my unique nanonets model API. I can insert it anywhere in my python code, and it will return me a JSON file stating where the squirrel is in the picture by coordinates. Nanonets has a tester itself, so I uploaded a squirrel picture I had not used before and got a result with the squirrel annotated :)